 how-to
Integrating Pool and Landscape Design Plans: 7-Step Guide
Table of Contents
- Why Pool and Landscape Design Plans Should Be Drawn Together
- What Happens When the Two Plans Are Built Separately
- Step 1: Map Site Conditions Before Anyone Sketches
- Step 2: Set the Backyard Pool Design Plans and Layout
- Step 3: Coordinate Pool Deck and Patio Design With the Pool Shell
- Step 4: Solve Pool Drainage and Grading on the Drawings
- Step 5: Choose Pool Landscaping Ideas That Survive North Texas
- Step 6: Run a Plan Review Checklist Before Construction Starts
- Step 7: Sequence Construction and Manage Changes in Writing
- Frequently Asked Questions
Last Updated: October 18, 2026
Why Pool and Landscape Design Plans Should Be Drawn Together
Pool and landscape design is the practice of drawing the pool shell, deck, grading, planting, and outdoor structures on one coordinated set of plans. When those drawings are separate, the pool gets built first and everything else has to work around it.
That order creates problems you cannot undo later. Equipment pads land where a pergola should go. Deck elevations fight the pool coping. Planting beds get squeezed into leftover space.
At Villefort Luxury Outdoor Living, we draw the pool and the yard as one plan. The 7 steps below show how that process works, from site map to final walkthrough.
What Happens When the Two Plans Are Built Separately
The most common failure is a pool set too close to the house or fence line, leaving no room for a deck that actually fits furniture.
Other issues follow fast:
- Skimmer and equipment placement conflicts with future structures
- Grading slopes water toward the patio instead of away
- Planting beds end up too narrow for mature root systems
- Lighting and irrigation get added after concrete is poured
A common mistake is treating landscaping as decoration added at the end. In practice, planting, drainage, and structure placement all depend on where the pool sits.
Step 1: Map Site Conditions Before Anyone Sketches
Site mapping is the first step: measure the lot, note slopes, locate utilities, and record sun exposure before design begins. Every later decision depends on this baseline.
Walk the yard and document:
- Property lines, easements, and setback requirements
- Existing trees, their root zones, and canopy spread
- Utility locations, including gas, electric, and sewer
- How water currently drains across the lot
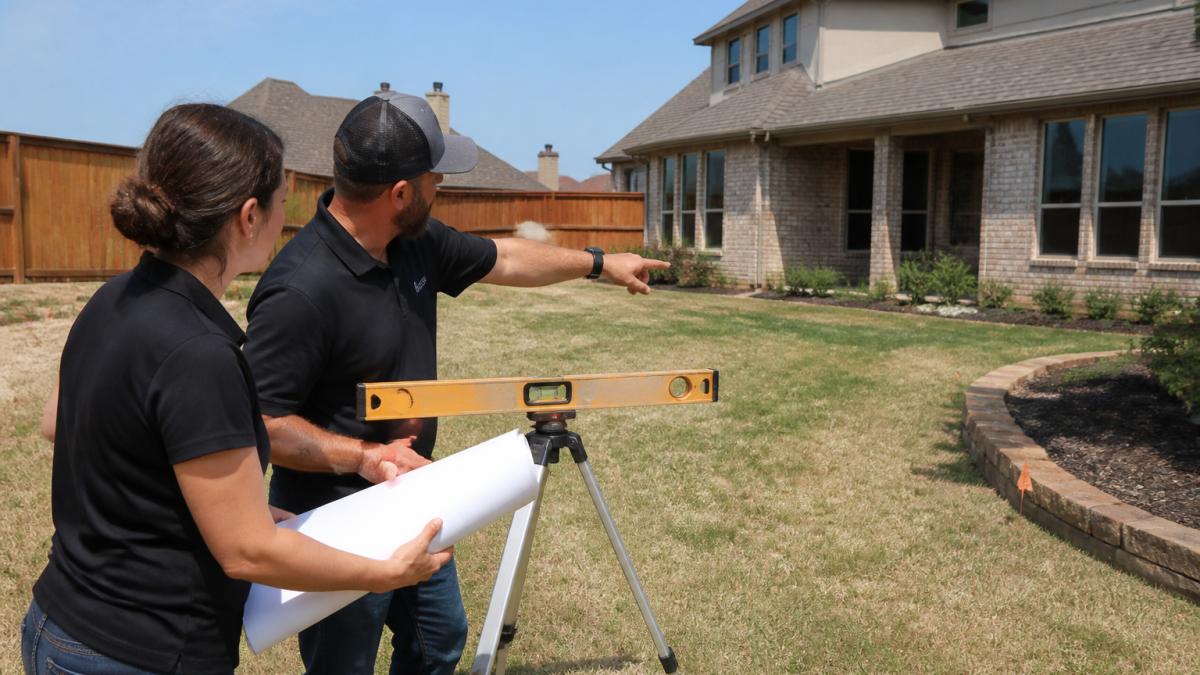
Check local setback and pool barrier rules with your city before design starts. Requirements vary by municipality, and confirming them early prevents redesigns later.
Step 2: Set the Backyard Pool Design Plans and Layout
Backyard pool design plans should fix the pool's position, shape, and orientation before any material selections happen. Get this step right and everything downstream gets easier.
A helpful reference point: Leisure Pools USA's 2026 design trends report notes a 16% rise in Silver Grey finishes as homeowners tie pool color to the surrounding architecture. The takeaway is that finish choices follow layout, not the reverse.
Pool Placement, Shape, and Distance From the House
Place the pool where it serves daily use, not just the view from the kitchen window. Consider:
- Distance from the back door for easy access
- Sun path through the day and where shade falls
- Sight lines from main living areas
- Room for a deck that holds seating and traffic
Geometric shapes suit formal yards and clean architecture. Freeform shapes fit naturalistic planting. Neither is better, but the shape should match the house and the planting plan you intend to build.
Step 3: Coordinate Pool Deck and Patio Design With the Pool Shell
Pool deck and patio design must match the pool shell's exact dimensions, coping profile, and waterline height. A deck drawn without those numbers will not fit on site.
Coordinate these details on one drawing:
- Coping type and overhang
- Deck elevation relative to water level
- Expansion joints and control joints
- Drainage slope away from the shell
- Material transitions between deck and patio
Step 4: Solve Pool Drainage and Grading on the Drawings
Pool drainage and grading determine where stormwater goes, and the drawings must show it explicitly. Water that pools against the shell or under the deck causes settling and staining.
Show these on the plan:
- Finished grades at the shell, deck edge, and property line
- Swales or surface channels that move water away
- Deck drains and their discharge points
- Downspout and roof runoff routing
Grading should slope away from the house and pool at a consistent fall. If the lot is tight, a channel drain or dry creek may be the only workable answer. Decide that on paper, not after concrete is poured.
Step 5: Choose Pool Landscaping Ideas That Survive North Texas
Pool landscaping ideas should start with plants that handle heat, heavy clay soils, and occasional hard freezes. Beauty matters, but survival matters more, and a plant that thrives in a nursery pot can fail once it sits next to reflected heat from a deck.
A practical poolside plant list for this region includes:
- Low-litter evergreens such as dwarf yaupon holly and compact Texas sage for structure without heavy leaf drop
- Ornamental grasses like Gulf muhly and inland sea oats for movement and softness at the deck edge
- Heat-tolerant perennials such as coneflower, blackfoot daisy, and lantana for seasonal color with low water demand
- Small ornamental trees like vitex or crape myrtle set back from the coping so flowers and seed pods blow away from the water
- Privacy screening using wax myrtle, cherry laurel, or bamboo in a root barrier, placed to block sight lines without casting shade on the pool
Plan for debris management up front. Skimmers work better when planting beds sit downwind of prevailing breezes and trees are set back from the coping. In this region, summer breezes typically come from the south, so a bed placed south of the pool will shed leaves and flowers into the water more than one placed north.
Clay soil is the other variable. Poolside beds often sit on compacted fill from excavation, which drains poorly. Amend beds with compost and consider raised planting areas or a French drain behind the bed line so roots do not sit in saturated soil after a storm.
Freeze protection deserves a line on the plan too. Even cold-hardy species can be damaged by a hard freeze following warm weather, so locate tender plants where they can be covered or moved, and keep irrigation controllers on a freeze sensor so lines do not run during a hard freeze.
Step 6: Run a Plan Review Checklist Before Construction Starts
A plan review checklist catches conflicts while they are still lines on paper. Run it with the pool builder and landscape designer in the same room, with every drawing set side by side and a shared reference point, usually the property corners or a fixed benchmark elevation, so dimensions and grades can be compared directly.
- Pool shell dimensions match deck and coping drawings
- Equipment pad location clear of future structures
- Finished grades and drainage shown at every edge
- Utility routes confirmed and marked
- Plant list with mature sizes and spacing
- Lighting and irrigation on separate plans that align
- Pool barrier and safety requirements confirmed with the city
- Material selections and quantities listed
Most conflicts surface in the overlap between drawings. The ones that cost the most are usually elevation conflicts, a deck drawn at one height and a pool coping drawn at another, and utility conflicts, where a gas line or electrical conduit runs through a future pergola footing.
A drawing coordination review should also confirm:
- Dimensions, pool length, width, and depth match on the shell plan, deck plan, and equipment schedule
- Elevations, finished grade, waterline, coping height, and deck slope are called out consistently
- Utilities, gas, electric, water, and sewer routes are shown on the same base plan as structures
- Drainage, swales, deck drains, and discharge points are shown with direction of flow
- Access, equipment and construction access routes are clear of future planting and structures
- Revisions, every change is dated and initialed, with the current sheet marked so no one builds from an outdated drawing
If the pool plan and landscape plan carry different revision dates, stop and reconcile them before construction. Building from mismatched sheets is one of the most common sources of change orders. ::: Aligning these technical documents early prevents costly field adjustments while facilitating the process of integrating construction costs into the broader architectural design.
A written revision log, even a simple sheet listing the date, the change, and who approved it, keeps the plan set honest through construction. When a field adjustment is needed, update the drawing and the log together so the as-built set matches what was actually installed.
Step 7: Sequence Construction and Manage Changes in Writing
Construction sequencing should be written down before the first shovel hits the ground. The order of work affects cost, access, and finish quality.
A typical sequence runs:
- Site prep, grading, and utility trenching
- Pool excavation and shell construction
- Equipment set and plumbing pressure test
- Deck and patio forming and pour
- Structures, pergolas, and outdoor kitchen build
- Planting, irrigation, and lighting
- Final grading, cleanup, and walkthrough
Manage changes in writing. Any field adjustment should be documented with cost and schedule impact before work continues. Verbal changes are how budgets slip.
| Step | What It Covers | Who Signs Off |
|---|---|---|
| Site map | Slopes, utilities, setbacks | Designer and builder |
| Layout | Pool placement and shape | Homeowner |
| Deck and patio | Coping, elevations, joints | Builder and mason |
| Drainage | Grades, drains, discharge | Designer |
| Planting | Species, spacing, irrigation | Landscape lead |
| Plan review | Cross-check all drawings | All parties |
| Sequencing | Build order and change log | Project manager |
That is the whole case for drawing pool and landscape design plans together: fewer surprises, cleaner sequencing, and a yard that looks intentional from every angle.
Planning a backyard in North Texas means coordinating a lot of moving parts, and the order you decide them in matters more than most homeowners expect. Villefort Luxury Outdoor Living designs and builds pools, patios, pergolas, outdoor kitchens, and landscaping under one plan, with transparent pricing and hands-on attention from consultation to final walkthrough. Financing options are available.
Frequently Asked Questions
Should pool and landscape plans be designed at the same time?
Yes. Drawing them together prevents the most expensive mistakes, like a pool shell placed where a future pergola or outdoor kitchen was planned. When pool and landscape design plans are developed as one set of drawings, the pool builder and landscape designer agree on elevations, utility routes, and access before anyone breaks ground. Doing the landscape after the pool is finished often means working around finished decking and irrigation, which raises costs and limits what you can plant or build.
What should be included in a pool and landscape plan?
A complete plan set should show the pool shape and depth, deck and patio materials, retaining walls and grading, drainage routes, irrigation zones, lighting and electrical, plant selection with mature sizes, and the location of outdoor structures like pergolas or kitchens. It should also mark utility lines, equipment pads, and construction access. Ask for a plan review checklist that confirms every trade is working from the same drawing, so the pool contractor and landscaper are not solving the same problem twice.
How do you coordinate pool decking with patios and walkways?
Start with one material and one elevation. Set the pool coping height first, then design pool deck and patio design around it so the transition from deck to patio has no trip edge. Walkways should be at least as wide as two people passing comfortably, and steps should be grouped rather than scattered. Confirm the deck slopes away from the pool and the house at the same time, and have the decking plan approved before the pool shell is shot, since changing materials later usually means removing concrete.
What drainage should be planned around a swimming pool?
Pool drainage and grading should keep surface water moving away from the pool shell, the deck, and the house. That typically means deck drains or channel drains at low points, a swale or French drain behind retaining walls, and downspout extensions routed past the pool area. In North Texas, heavy spring storms make this critical: water that ponds against a pool deck can undermine the base and stain stone. Have the grading plan show finished elevations and the path water takes during a storm, not just the pool equipment location.